Look Around:
Move Keys:
Move:
4D CUBES
4D spheres were a good introduction, but 4D cubes (also known as 4D hypercubes or tesseracts) are worth taking the time to really sit with. They're simple enough to understand, yet complex enough to reveal most of the strangeness found in 4D.
To build a 4D cube, let’s start all the way back with a simple 1D line.

Drag that line along the y axis to create a 2D square.

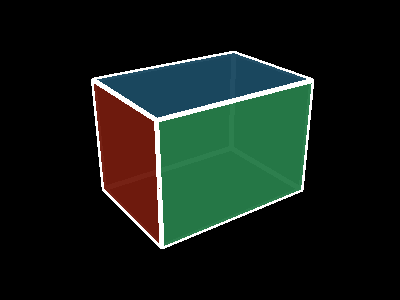
Drag that square along the z axis to create a 3D cube.
And finally, drag that cube along the w axis to create a 4D hypercube!
An interesting pattern can be observed here: a line had 2 points, a square had 4 lines, and a cube had 6 squares, so it follows that our tesseract will have 8 cubes.
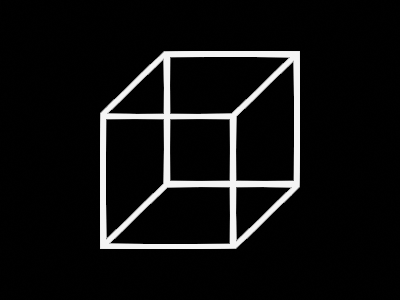
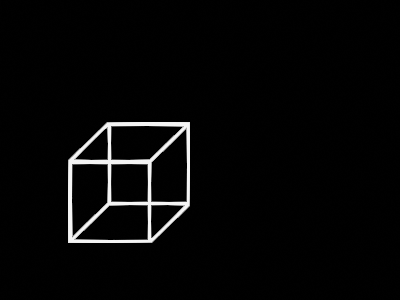
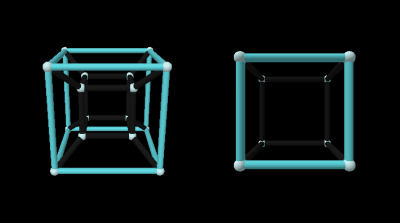
But don't worry too much about deciphering this squished image – this visualization is beneath us. Behold the world’s most famous 4D object: the projection of a 4D hypercube!
To start, just play around with all the rotation sliders to see how the projection morphs around.
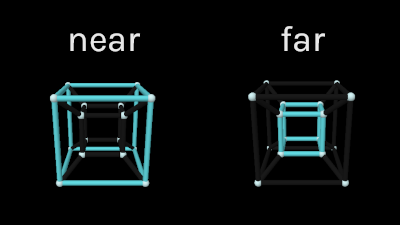
Remember that due to projection, points that are further away on the w axis will shrink towards the center of the 3D image. To see how this affects the tesseract’s 8 cubes, set all the rotation sliders to 0°. The outer cube appears larger because it's near us on the w axis, and the inner cube appears smaller because it's further away.
All 6 connecting cubes are moving from near to far so they get skewed into trapezoidal prisms along the way. This is all analogous to the 2 squares connected by trapezoids you see in the projection of a 3D cube.
Rotate on one plane and you see the cubes growing and shrinking as they move in and out of the center. Again, a similar motion can be seen with squares in a 3D cube projection.
Now that we’re familiar with the basic structure of the 4D cube, we're ready to observe its slices. This is what a 4D cube would look like if it moved through our 3D universe! 😮
Again, just go crazy playing with all the sliders for a bit. Does anything seem familiar?
The first big realization is that the object you’re looking at is just a bunch of 2D slices of the tesseract's 8 cubes stuck together!
..But if we're viewing in 3D, why would the 3D cubes get sliced to 2D?
This is due to the cubes being situated somewhere along the w axis. You could give a cube the slightest twist into the fourth dimension and all that would remain in our 3D universe is a 2D slice. The same can be seen one dimension lower where a square rotating into the third dimension instantly turns into a 1D slice.

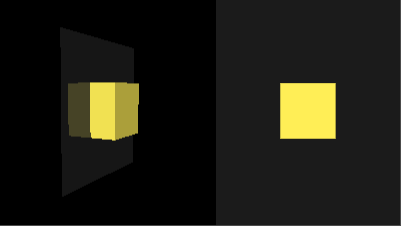
Of course if a cube is too far from us on the w axis, then not even a slice will appear in our 3D universe. Observe the slice created when all the sliders are set to 0. Even though the tesseract has 8 potential cubes to slice, the final image appears to be a normal cube with only 6 faces.
This makes sense when you realize the 2D slice of a 3D cube in the same position is just a square with 4 sides, even though the cube has 6 faces. The 3D cube has two faces that aren’t intersecting with the 2D universe, and the 4D hypercube has two cubes that aren’t intersecting with the 3D universe.
Here are some more direct parallels with the 2D slices of a 3D cube.
Moving face first:

Moving edge first:

Moving corner first:

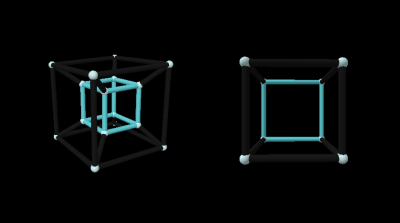
There’s also insight to be gained by comparing the tesseract’s slices directly to its projection. Here you’ll want to select “Color Cubes” so you can keep track of the cubes between visualizations. Note: in the projection we can’t color all 8 cubes at once because they share edges, so only 2 are highlighted at a time.
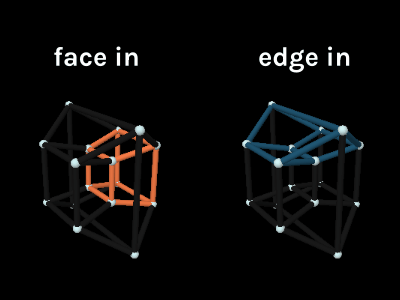
Look what happens when you rotate on only ZW by 45°.
The slice has 2 square faces and 4 rectangular faces. According to what we learned when slicing a 3D cube, this means 2 of the tesseract’s cubes are moving through the 3D universe face first while 4 others are edge first.
Look over to the projection image and this is the exact alignment you’ll see. The cubes colored and have their faces pointed inwards while the , , , and cubes have their edges pointed inwards.
There’s really no limit to the amount of insights you can gain from these tesseract representations, but at this point we’ve covered all the core concepts. In fact, you’re probably much more capable of understanding the fourth dimension than you realize. Think of all the 3D objects that can be approximated as just a stretched sphere or cube. You now have the tools to understand the equivalent objects in 4D by representing them as a stretched 4D sphere or 4D hypercube!